
tunic sleeves

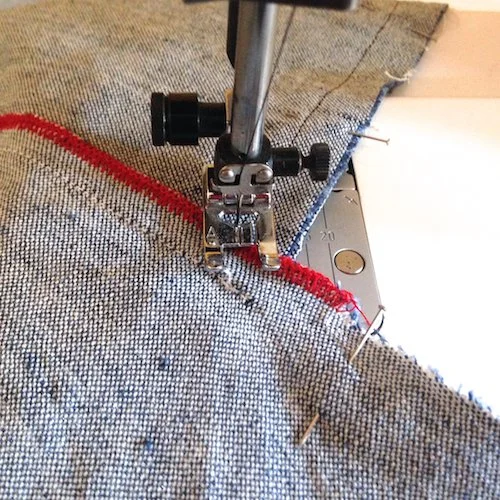
Start sewing at the cuff, using a 1/2 inch (12 mm) seam allowance. When you reach finished edge of where the sleeves were attached to the body (the red serged edge in the photo) stop sewing. Note that you stop BEFORE the actual seam.
Leave the needle in the down position, keeping the fabric in place. Lift presser foot and turn the garment slightly clockwise. Lower the presser foot. Sew for 1/2 inch (12 mm) across the seams. Take special care so the finished edges of the sleeve and body stay flat as you sew over them. This is just a small amount of sewing, but very necessary.

Stop sewing and again with the needle in the down position, lift the presser foot. Turn garment almost 90 degrees, so presser foot is once more parallel to edge of fabric. Lower presser foot and continue sewing to the bottom edge of the tunic, using a 1/2 inch (12 mm) seam allowance.

When you finish sewing, the armpit of your tunic should have three distinct sewing lines – horizontal along the sleeve, the angle at the armpit, and the vertical down the body. The extra step in the middle is VERY important. Without it or if it is too short, your tunic will bunch unflatteringly at the armpits.

From the rightside, your tunic whould have almost a curve at the underarm, not a right angle. Finish the sleeve seam and continue with the rest of the tunic instructions.