shirt grading

The new Shirt no. 1 pattern runs from sizes XS-5X, along with a grading adjustment to correct the amount of ease, especially in the smaller sizes. Please note, there is no change in the XL size. To modify an older version, first trace out your size and cut out the pattern piece.
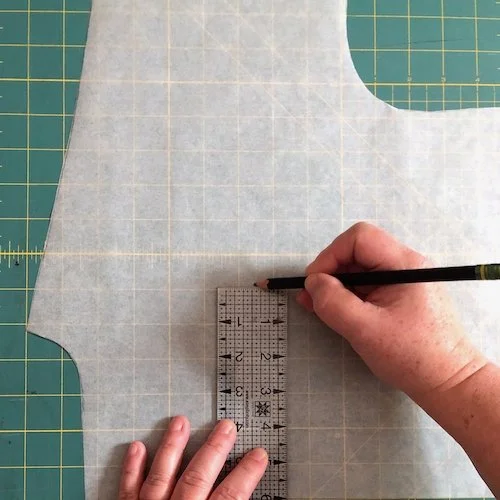
Measure 6 inches (15 cm) from center and mark. Repeat to make two more marks further down the pattern piece.

Draw a vertical line to join the points and then cut along the line.

On the half of the pattern piece with the sleeve, measure down 6 inches (15 cm) down from the shoulder and mark.

Then measure down 4.5 inches (11 cm) down from the shoulder at the sleeve and mark.
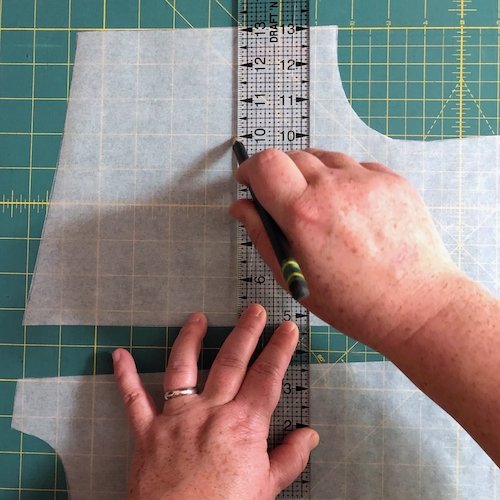
Draw a horizontal line to connect.

From that line, measure 5 inches (13 cm) down at the cut edge and mark. Measure again closer to the sleeve, mark and draw a horizontal line to connect. Cut along both lines.

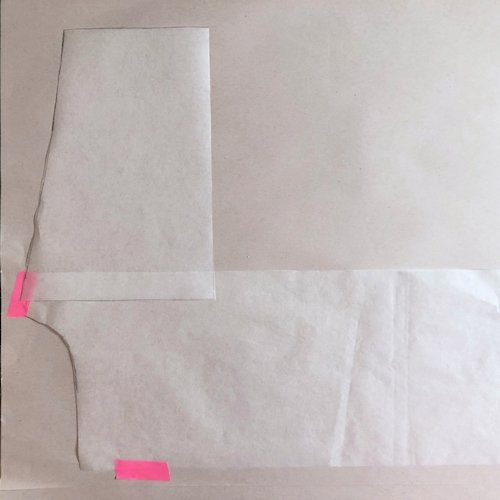
You will now have four separate pieces: center body, sleeve top, underarm and side. Next, place the center body piece on top of tracing paper, newsprint, or any large sheet of paper and tape down. To decrease ease, follow instructions below. To increase, jump to instructions here.
To decrease ease, position sleeve top piece, line it up at the shoulder and overlap the body piece by the amount corresponding to your size: XS: 1 inch (2.5 cm); S: 3/4 inch (19 mm); M: 1/2 inch (12 mm); L: 1/4 inch (6 mm). Tape piece down.

Next, position the underarm piece with 1/4 inch (6 mm) gap between it and the sleeve top. Overlap by the amount corresponding to your size. XS: 1 1/2 inches (4 cm); S: 1 1/8 inch (3 cm); M: 3/4 inch (19 mm); L: 3/8 inch (10mm). The pieces will not line up at the sleeve, this will be adjusted later. Tape piece down.

Then position the side piece with 1/4 inch (6 mm) gap between it and the underarm. Overlap by the amount corresponding to your size. XS: 1 1/2 inches (4 cm); S: 1 1/8 inch (3 cm); M: 3/4 inch (19 mm); L: 3/8 inch (10mm). Tape piece down.

Trace around neckline and shoulder. Position ruler along the straight edge of the sleeve top and re-draw line.

Extend the line of the underarm and connect the gap between the side with a short line. Trace down the side and across the hem sweep.

To increase ease, line up sleeve top piece at the shoulder and separate from body with the amount corresponding to your size: 2X: 1/4 inch (6 mm); 3X:1/2 inch (12 mm); 4X: 3/4 inch (19 mm); 5X: 1 1/2 inches (4 cm). Tape piece down.

Next, position the underarm piece with 1/4 inch (6 mm) gap between it and the sleeve top. Separate from body with the amount corresponding to your size: 2X: 3/8 inch (9 mm); 3X: 3/4 inch (19 mm); 4X: 1 1/8 inch (3 cm); 5X:1 3/4 inches (4.5 cm). The pieces will not line up at the sleeve, this will be adjusted later. Tape piece down.

Then position the side piece with 1/4 inch (6 mm) gap between it and the underarm. Overlap by the amount corresponding to your size: 2X: 3/8 inch (9mm); 3X: 3/4 inch (19 mm); 4X: 1 1/8 inch (3 cm); 5X: 1 3/4 inches (4.5 cm). Tape piece down.

Trace around neckline and shoulder. Position ruler along the straight edge of the sleeve top and draw the line, folding over the sleeve of the underarm piece to continue to the end. Extend the line of the underarm and connect the gap between the side with a short line. Trace down the side and across the hem sweep.